Building a SHARI Node
SHARI
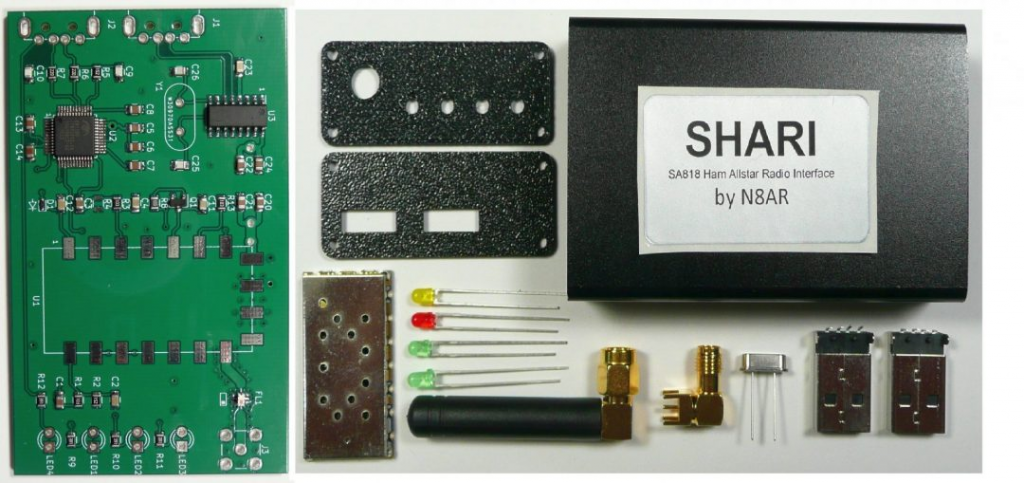
A Shari Node (or SHARI, which stands for SA818 Ham Allstar Radio Interface) is a device used to create a low-power, personal AllStarLink node. It allows amateur radio operators to connect their radios to the AllStarLink network using a Raspberry Pi or similar system. The SHARI device is based on the SA818 VHF/UHF radio module, making it a compact and easy-to-use solution for setting up a node.
What is AllStarLink?

AllStarLink (ASL) is a Voice over IP (VoIP) system designed for amateur radio communications. It is built on the Asterisk PBX (Private Branch Exchange) software and enables licensed amateur radio operators to link radios and repeaters over the internet. Some key features of AllStarLink include:
- Worldwide Linking – Allows hams to connect to repeaters and other nodes globally.
- Flexible Connections – Nodes can link to individual users, repeaters, or networks like EchoLink and IRLP.
- Customizable and Open-Source – Users can configure their nodes with custom scripts, linking rules, and additional features.
How Does a SHARI Node Work?
A SHARI node functions as a low-power simplex node, meaning it operates on a single frequency (not full-duplex like a repeater). It consists of:
- A SA818 radio module (VHF or UHF)
- A USB interface for connection to a Raspberry Pi
- A small antenna and PTT control circuit
When a licensed ham operator transmits on a specific frequency, the SHARI node picks up the signal and routes it through the AllStar network, enabling communication with other linked nodes or repeaters.
Why Use a SHARI Node?
Portable and Low-Cost – Ideal for personal use or emergency communications.
- No Need for a Full Repeater – Functions as a lightweight, personal node.
- Hands-On Learning – A great way to experiment with AllStarLink and VoIP in amateur radio.
Would you like details on how to set up a SHARI node, or are you looking for troubleshooting tips? Read on 🚀
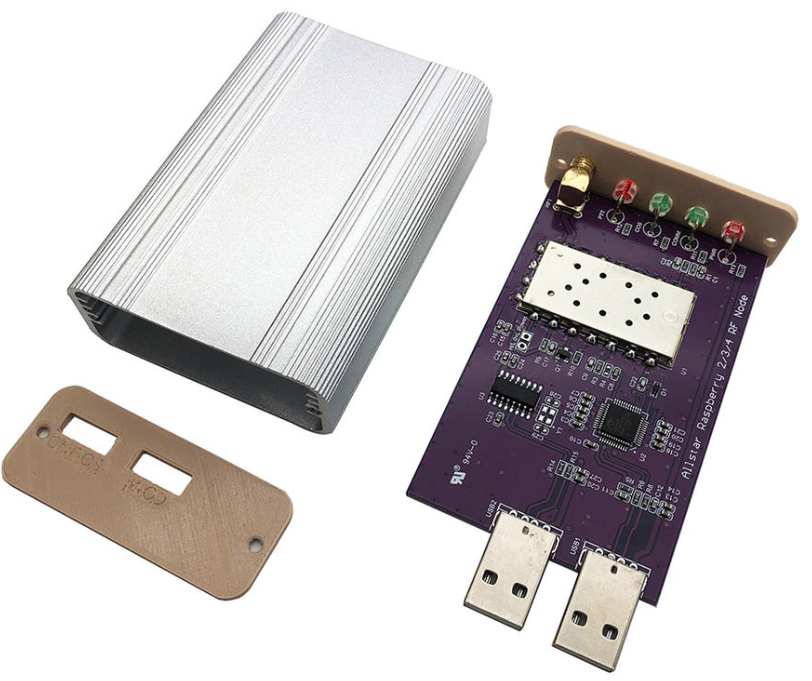
Below is an image of a SHARI clone available from Amazon and popular Chinese marketing sites:
Starting the SHARI build
First gather the necessary hardware and a Raspberry Pi (recommended 3/3b/4)
Then install Allstar Linux v3
Once the install is complete, you then need to configure the SA818 modem…
Regsiter for an Allstarlink node number
- Vist the Allstarlink.
- Register for an account here
- Regsiter a server Finally
- Register a node
- Remember to make a node of the node number and password, we will need these later!
Allmon3 Configuration
You should have already done this step, if you followed the setup guide above. If not here it is again:
sudo allmon3-passwd --delete allmon3; to remove the default login
sudo allmon3-passwd <new user login>; to set the new user login. Type the new password when prompted.
sudo systemctl restart allmon3; to load the new login.
You can then head to the allmon3 interface to manage what nodes, your SHARI node can connect to…. This will be covered a bit later, after we have configured the modem.
- http://<your node ip>/allmon3
- http://<yournodename>/allmon3
Raspberry Pi
Changes to config.txt
If you are debugging your install with a HDMI monitor, you may run into some sounds troubles? This could be down to the HDMI acquiring the soundcard of the SHARI node, to prevent this from happening we need to make changes to the Raspberry pi configuration.
We can change the following line in /boot/config.txt, to prevent the HDMI acquiring the SHARI ndoes soundcard :
dtoverlay=vc4-kms-v3d
change to:
dtoverlay=vc4-kms-v3d,audio=off
at the bottom where you have:
dtoverlay=disable-bt
The chinese clones require 1-1.2 Amps to function correctly, modifiy the bottom of config.txt to reflect:
max_usb_current=1
enable_uart=1
dtoverlay=disable-bt
Then reboot, next we will configuer the modem.
Broadband router changes
For your node to function correctly, you need to configure a port forwarding rule for your home broadband router.
You need to enable forward for 4569, in-order for other nodes to be able to fully connect to your node.
SA818
Througfh cockpit, run the following command
sudo sa818-menu
Configure you node as follows:
- Band: UHF (unless you have a VHF varient)
- Bandwidth: Wide
- Frequency: 446.100 (or if etcc have allocated you a gateway freq insert that here)
- Squelch: 1
- Volume: 5
- Sub-audible tone: None (for testing, you can change this later)
- Pre-emphasis: Disabled
- De-emphasis: Disabled
- High pass filter: Disabled
- Low passs filter: Disabled
- Serial Port: /dev/ttyUSB0
- Speed: 9600
The script should then configure you modem. If you encounter an error its likely that the serial port is possibly on a different port. e.g. /dev/ttyAMA0
ASL-menu
SimpleUSB-menu-tune
As asterisk restarts this menu system should autoload. If for whatever reason it doesn’t, you access it via:
sudo simpleusb-tune-menu
First off we need to change some settings:
- Toogle Pre-emphasis: Enabled
- Toggle De-emphasis: Enabled
- Toggle PL-Filter: Enabled
- Change Carrier from: usbinvert
- Change CTCSS from: none/no
- w to save
Testing TX
Firstly, I like to test a transmission.
Configure you HT to your frequency of your node then at the menu system:
- Hit T to Toggle Transmit Test Tone
- then 3
Hopefully, you should hear a tone through your HT!
Next to adject the receive volume!
Testing RX and sound level
First, set the alsamixer level
sudo alsamixer -c 2
Change the soundcard CM108 level from 34 to 25. Then we go back to the sudo simpleusb-tune-menu step!
On the menu system choose:
- 2 For recieve
- Then Enter
Then key your HT and speak a little (dont forget your callsign)
You should see the bottom line dance partly across the screen
Then Enter, here you can change the value of the sound level, you dont want to over modulate, for our node our ideal value was between 600-700, for you this could be different.
Testing
We would advise first connecting to node 55553, this is a handy parrot node, that will analyse your audio and provide feedback, and I clip so you know what you sound like.
If youre audio is terrible, you will need to go back a step and reconfigure your RX audio.
Stations to try for a radio check:
55553	ASL Parrot for testing
41522	M0HOY HUBNet Manchester, UK
2167    M0JKT, Freestar Network, UK
You are now connected to AllStarLink network and have the world at your finger tips. Below is a small list of nodes in the UK, Australia and America to get you started chatting with other HAMs via your node
60349	VK6CIA 439.275 Perth, Western Australia
51077	VK6SEG South West Hub B Albany WA
53573	NWAG NW AllStar Group Lancashire, UK
27339	East Coast Hub Wilmington NC USA
Enjoy the world of Allstar!
Now hopefully you are up and running and can enjoy the world of Allstar and make many QSO’s.
Other Allstar management software
In addition to Allmon3, I personally like Allscan. Consider adding this to your build?
Allscan will poll the stats of a list of favourites (that is easily modifiable). You can quickly see which nodes have traffic, and jump to them to either listen in or participate.